Global Reality

Added on by Olivia Greco.

Olivia Greco

Data mapping
Coding
Installation

Danielle Yoon

Soldering    
Coding
Installation

Cheonhyun Park

Globe fabrication
Soldering
Installation     

 
museummockup.jpg

Global Reality is a 3D visualization of the effects of global warming over the past 135 years, from 1880 to 2015.

The light sequence is based on data from Nasa’s Scientific Visualization Studio that illustrates Earth’s long-term warming trend from 1880 to 2015 as a rolling five-year average.

2015 was the warmest year since modern record-keeping began in 1880.   

IMG_4833.jpeg
IMG_4898.jpeg
Screen+Shot+2018-12-16+at+1.07.20+PM.jpg

We divided the video into 90 still frames and drilled 128 holes evenly-spaced across the globe. and mapped each hole to a coordinates on the flat 2D map from the video. In each of the 90 frames, we recorded the RGB value for each coordinate. This RGB value would correspond to the LED showing through that hole on the 3D globe. We Chose to only map continents because our intent was to show the globe in a dark setting, and when the LED’s light up, we wanted it to be obvious the viewer was looking at a globe.

We soldered 128 neopixel LEDs together and fixed the LEDs to the inside of each hole with hot glue and electrical tape. We programmed the LED sequence using an Arduino Mega. View our code here.

Screen+Shot+2018-12-16+at+1.07.32+PM.jpg

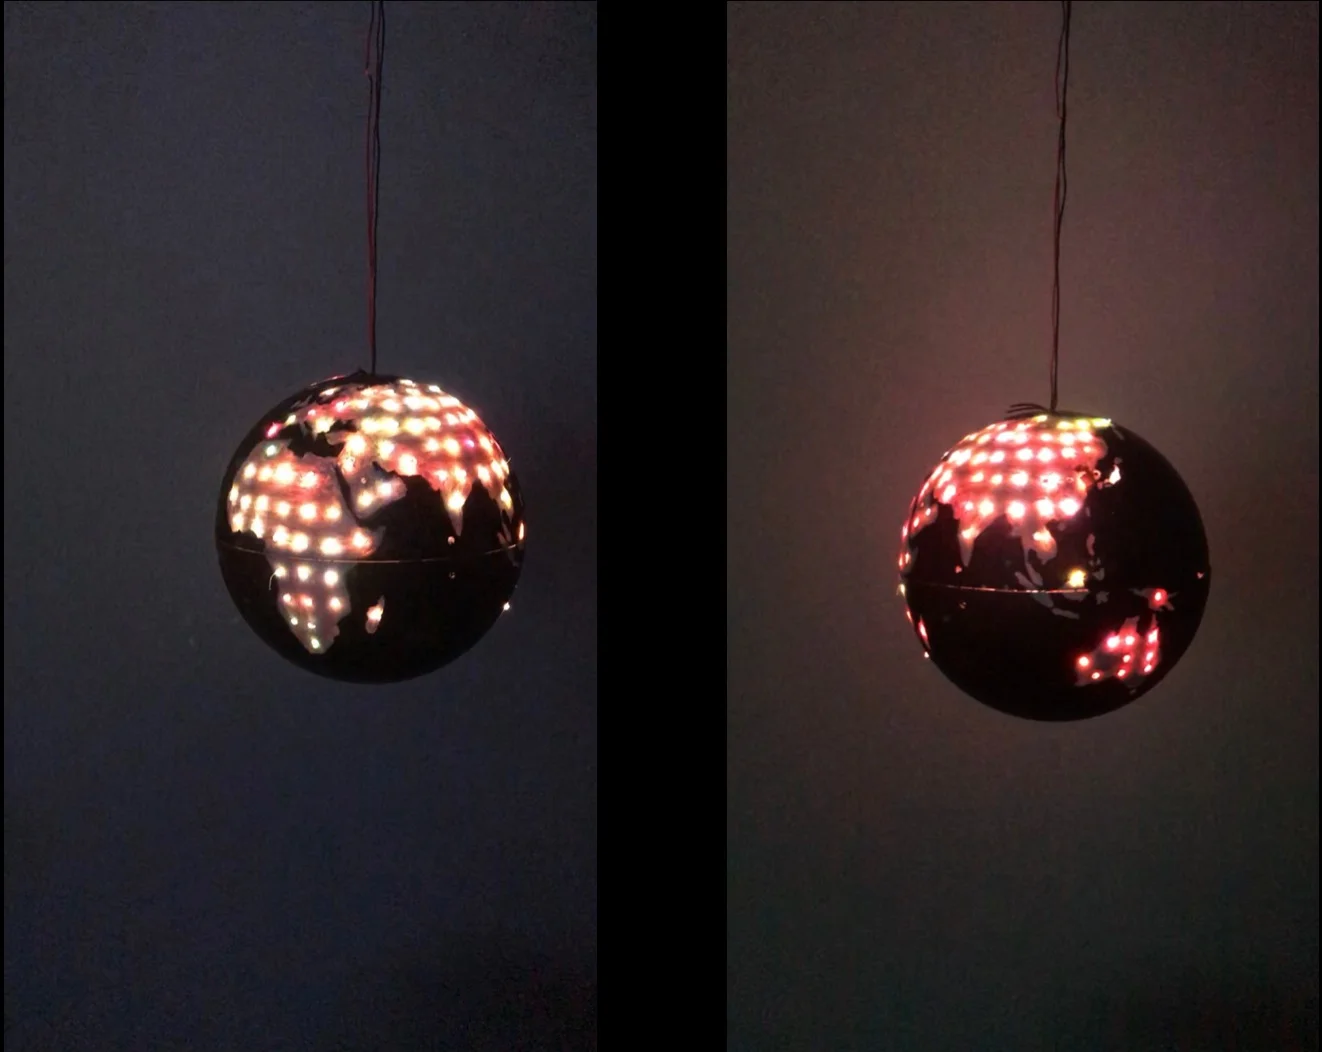
We see the Global Reality installation in a museum or exhibition setting where visitors could enter an exhibit and learn about global warming’s effects on the earth.

Human Population Globe

Added on by Olivia Greco.

Our team’s idea for a final project is to create a 3D way to visualize data about human population growth on the planet earth over time. Our globe could serve an educational purpose as a more interactive, easily visualized way to understand how human life has spread across the globe. We will buy a small 5-6” globe and fasten it through an axis to a slightly larger clear plastic globe that will fit around it. We will use neopixel strips of LEDs to illuminate areas of each continent to represent population mass. We will use a gesture sensor for users to make the earth spin by waving their hand right or left in front of the globe, and the globe will spin on its axis using motor. We will also use a potentiometer which the user can interact with to manually view/adjust the year that they’re seeing represented through the LEDs lit up on the continents.

Communicating between Arduino and Processing

Added on by Olivia Greco.

This project experiments with sending input from the Arduino to Processing, while incorporating a few different elements. 

Our circuit includes a blue LED, an infrared proximity sensor which detects the reflection of an infrared light within about a 10-80cm range, and a global on/off switch which controls the entire circuit. The wiring is housed in a white acrylic box which we laser cut so that the switch, LED, and sensor are accessible from the outside.

Wiring inside

Wiring inside

LED and switch

LED and switch

IR sensor

IR sensor

When you interact with the sensor by moving closer to it, the LED gets brighter. This input information is sent from the Arduino to Processing, which uses the information to draw a cyan box with different text that appears when the user interacts with the sensor at separate defined distances. The point size of the text is mapped to the sensor distance value, so the text grows as the user comes closer. A new word appears incrementally at each closer distance. 

Our concept is based on the idea of an enticing storefront display. The user might walk by and become interested. As the user moves closer, the increasingly brighter light and changing text intrigue them even further, and convince them to come into the store. 

Flashing Light Game

Added on by Olivia Greco.

Goal: create a game using some combination of switches/sensors and using (if) statements to produce a certain output only if certain things are done in a certain order.


My team created a game where there are 5 LEDs in a row. The middle LED is red. The LEDs blink on one at a time in a row. If the player presses the push button when the light gets to the middle red light, a melody will play and the game will speed up and continue.


gamedirections.jpg

Media Art inspo

Added on by Olivia Greco.

This piece called Spin Stack is an interactive music installation that allows users to build their own beats and tracks, with a visual component. The user physically stacks multiple spinning sculptural pieces on top of each other that serve as surfaces for projected colorful wave images. The spinning sculptures interact with sensors that measure distance and sound. The shape of the actual piece affects the pattern and sound.

The Spin Stack also has a custom keyboard component where the user can add beats and percussion.


Physical Computing Project 2: Enhancing the Switch

Added on by Olivia Greco.

To enhance my homemade switch, I used a light-controlled variable resistor (photoresistor) in my circuit so that when the lights in the room are turned on, the LEDs around the mirror light up. When the lights are off, the LEDs turn off.

This would be practical if the lights were perhaps white and very bright, for example, as one might want to have this mirror illuminated on a vanity or bathroom counter.

IMG_4245.jpg

Here’s a schematic of my original circuit and my enhanced circuit. (No real reason for losing 1 LED besides the fact that I burned out all of my red LEDs and just used 2 yellows for simplicity.) In wiring the actual mirror, I simply replaced the resistor with a photoresistor.

When the lights are on around this circuit, the resistance of the photoresistor is lower, so the LEDs will light up. When the lights are off, they’ll go out.

Next, I used the Arduino as an in-between from the new analog input, and the LED output. I had to change this circuit in order for the Arduino to work. The variable resistor (photoresistor) has to be converted to varying voltage so that the Arduino can read it. I added a resistor to affect the voltage. The video shows me affecting the sensor with my hand by covering the sensor instead of turning on and off the lights.

Physical Computing Project 1: Object with Home Made Switch

Added on by Olivia Greco.

Assignment: Create a sculptural or architectural or toy-like or just weird object with some LEDs and a homemade switch. Try to use an unexpected material, and/or an unexpected behavior.

I built a homemade switch using a countertop mirror, 3 red LEDs and a 9V battery. When you adjust the mirror (tilt backward), the lights on top of the mirror turn on. 


IMG_4123.jpg
IMG_4128.jpg
IMG_4157.jpg